Category: outdoor play
Showing posts with label outdoor play. Show all posts

Clean the Beach

Tuesday, June 23, 2020 No comments


🌊clean the beach🌊⠀
⠀
It was the first day of summer over the weekend and we celebrated with a trip to the beach! By beach, I mean this fine motor activity beach for #goforthegoldsummer series. Same thing, right?😂 🏝⠀
⠀
Both my kids (5 and 2.5) had a blast doing this activity, it was great fine motor practice, quick and easy to set up, and after the activity was done, it turned into a sensory bin for the rest of the day! All and all it was a winner! ⠀
⠀
🏖The Set Up🏖⠀
⠀
🐠 Pour some sand (we used kinetic) in a tray or container and push it all to one side. ⠀
⠀
🦀Pour in some blue water (water with 1 drop of blue food dye mixed in). I poured it on the opposite side as the sand and put just enough that it touched the sand a bit.⠀
⠀
🐠Take shells and/or ocean animal figures and wrap them up with “seaweed” and “trash” (an assortment of rubber bands, pipe cleaners and yarn). Thank you @charlies_kids_creations for the idea to use yarn! ⠀
⠀
🦀Take the wrapped up shells and ocean animals and place them inside the bin in random spots. I also added two umbrella toothpicks into the sand for decor. ⠀
⠀
🐠Put out some fine motor utensils (scissors, tweezers, tongs, etc.) and a bowl or something to put the “trash” and “seaweed” in. ⠀
⠀
🏖The Activity🏖⠀
⠀
Have your child “clean the beach” by removing the tangled seaweed and trash off of the shells and animals using any of the fine motor utensils. After cleaning, have your child place the animals and shells back where they belong (on the sand or in the water). ⠀
⠀
Austin spent the majority of the time cutting with scissors. Brooklyn’s tool of choice was unwrapping with her hands and then using the tweezers to place things back where they belong. As they played we talked about the importance of keeping beaches clean to help protect marine life. ⠀
⠀
It was such an easy activity to set up, the kids were engaged, working on their fine motor skills, playing and learning! ⠀
⠀
🏖Make sure you’re following the hashtag #goforthegoldsummer on instagram


and all the amazing teacher accounts listed (swipe to last pic) that are participating! You don’t want to miss out on any of the beach themed activities this week! Happy Monday☀️

5 Activities with Picasso Tiles Alphabet Magnets

Monday, June 15, 2020 No comments


You guys! I've written numerous times about how much we LOVE our Picasso Tiles magnets. They are the most played with toy at our house by far.  

So when I was gifted these new alphabet magnets from Picasso Tiles to review,  you can imagine how excited I was.

 We have had them less than a week and have already played with them 5 different ways! They are such a great addition to all the other Picasso Tiles we own, and I can't wait to continue using them in future play-based learning activities. I have a whole list on my phone of more ideas I have of how to use these! Picasso Tiles are a STEAM TOY (science, technology, engineering, art, math) and there's so many benefits to incorporating STEM and STEAM activities into your child's play. These toys are more open-ended, promote creativity, problem solving, experimenting, and help prepare our children for future learning. Plus the alphabet letters on these magnets help with literacy too! There are so many great things happening when your child is playing with this toy. 

Scroll down to read about the 5 different activities we did this week using them to give you some ideas of how to play with them in your home.


 Click the affiliated link (picture below)
 to check out the alphabet magnets:


Stay at Home Activity Mom is a participant in the Amazon Series LLC Associates Program, 

an affiliate advertising program designed to provide a means for sites to earn advertising fees 

by advertising and linking to Amazon.com.

I get commissions for purchases made through links in this post. 


ACTIVITY #1: Initial Sound Sticker Match


I took Picasso Tiles magnets that we had from another set I own and stuck one reusable animal sticker on each one. Then I rounded up the alphabet magnets that I needed (the initial sound of each animal)  and took them outside with Austin (5).  If you don't have any other magnets for the stickers, you could always just put stickers on a post it and use post its instead! 

First I spread the alphabet letter magnets out on the garage door. Then I gave Austin all the magnets with the animal stickers on them and told him to identify the beginning letter of each animal by saying the animal's name and beginning sound and place it under that letter. 


Learning to identify initial sounds and matching them to objects (the animal stickers on magnets in this case) is an extremely important part of learning to read. After a child masters letter recognition and the sounds each letter makes, moving on to initial sounds with objects is great next step. Children often have an easier time with beginning sounds in words because they are at the beginning. Adding a tactile (hands-on) element helps children develop this skill, allowing children to use more than one of their five senses while learning. 


When your child makes a mistake, instead of just saying "No" or "try again,"
here's an idea for how you can help them better understand by turning it into a teachable moment. 

Example of how I helped Austin when he needed it:

(Austin picks up the magnet with the cat picture)

"This is a cat" -Austin

"What's the beginning sound in cat?" - me

"/s/.... S!" - Austin 

"Listen to me say the word cat.  /c/ (emphasize this sound)  /a/ /t/" - me

"/c/ is C!" - Austin 


If he had gotten it wrong again, I would have just said something like,

"/c/ /a/ /t/ says cat. Cat starts with c. It makes the sound /c/. Now you try".


After finishing placing the sticker magnets underneath the alphabet magnets, Austin said he wanted to play again! To change it up, I left the sticker magnets on the garage and took down the alphabet magnets. This time Austin had to place the letter magnet on top of the animal with that beginning sound. This way was a little tricker for Austin so I helped him a little more.


I posted this activity on my instagram page HERE if you want to see the original post! 

ACTIVITY #2: ABC Train Scavenger Hunt


This activity is a winner and takes so much time (in a good way)! It's one of those activities that will be up all day and your child will continue to work on little by little until they finish. 

I originally was going to just put the alphabet magnets flat on the ground in ABC order making one long line! Austin decided he wanted to create a "train" for the alphabet magnets so they could stand straight up by using our other Picasso magnets and placing the alphabet magnets on the top. That idea was even cuter than my original idea, but if you don't own other magnet tiles yet you can easily just place them on the ground or on white paper to make them stand out more! 

Have your child go on a scavenger hunt and find one small thing around the house that starts with each letter and place it under that letter. Austin found a cupcake for c, a frog for f, and so on. When you finish you'll have a really long and crowded train!


Austin had a blast running around the playroom and house looking for different objects that started with each letter. It was such a fun and easy set up and the activity got him moving and practicing matching initial sounds to objects. He loved this "train" so much he asked to keep it up overnight so he could see it again in the morning. HAHA.


Of course Toy Story characters made an appearance in this activity. Austin's obsessed with Toy Story, and the first thing he thought of for something that starts with B was this creepy Benson character in Toy Story 4. 


ACTIVITY #3: Color Name Towers


These alphabet magnets are a great toy to play with to help learn how to spell your name. We couldn't make Brooklyn's name because the set only comes with 1 of each letter, but I'm sure I'll buy another set of these soon! Austin's name was perfect to make since he doesn't have any repeat letters. 

We used Picasso Tiles we already had to create the bottom of the towers. (if you don't have other tiles yet, you could also build towers with blocks and place a small baking sheet or something else magnetic on the top followed by the letter magnet tile so it sticks). 

We looked at each letter in Austin's name and gathered other magnets of the same color (so Brooklyn could practice her color sorting). We made 5 towers (because the A and the U happened to both be pink we put both those letters on the pink tower). It was so fun and easy and beautiful! 

I wish the letters showed up more in the pictures, but I'm sure you get the point! My kids absolutely loved this activity so I told Austin we can do this activity again with sight words that he's working on. 


How much more fun is this than just learning to spell with pencil and paper?!

ACTIVITY #4: Alphabet STEAM Challenge


This is another super simple and fun activity to do with the alphabet magnets. Place all the magnets on the ground so your child can see each letter. Tell them they get to build and create anything they want, but they have to start by using the A magnet, then the B, then the C, etc. in ABC order all the way until they get to Z. This is a great way to get them to practice ABC order, letter recognition, and still gives them the space to be creative and build whatever they want. 


This STEAM challenge not only promotes creativity, but also is great for letter recognition! This was another hit that turned into using our other magnets to continue building a big alphabet tower after we got to Z. 

ACTIVITY #5: Outdoor Letter Hunt


For our last activity, we brought our alphabet magnets outside! I hid the magnets in random magnetic places that were still in plain sight around the backyard. To play, I called out a letter and my kids (my husband was on a team with my daughter because she still needs some support with letter recognition) would run around to see who could find the letter first. I love when we involve active play with learning!  It was also so beautiful to see the alphabet magnets outside in the sunshine! My kids were amazed by the fact that I had found so many random places that were magnetic outside! 


This activity could also be done by you saying a word and your child has to determine the first letter in the word and go find that letter! 


I hope you can see how genuinely happy I am with these alphabet magnets and how much use you truly can get out of them. If you're interested in them, be sure to click the affiliate picture link below to check them out! 


Stay at Home Activity Mom is a participant in the Amazon Series LLC Associates Program, 

an affiliate advertising program designed to provide a means for sites to earn advertising fees 

by advertising and linking to Amazon.com.

I get commissions for purchases made through links in this post. 


I can promise you will be seeing more of these alphabet tiles in the future on here! My family absolutely loves them! 


Thanks Picasso Tiles for a great product!

Sponge Boats

Tuesday, June 9, 2020 No comments


⠀
Add a little STEM challenge to your water play! ⠀
⠀
💦I took some new sponges and cut them in half. I gave my kids the sponges, some umbrella toothpicks (totally optional), and these little colored play jewels we have. I challenged them to make sponge boats and see how many jewels they could balance on each one in the water before sinking or tipping over. Bear counters, legos, pom poms, or anything else small like that could also work! ⠀
⠀
💦I watched my kids try positioning the umbrellas on different spots on the sponge, not using an umbrella on one, using two umbrellas on one, and trying so many different ways to balance the most jewels. When the boats sank, my kids squeezed the water out of the sponge and tried again!⠀


Stay at Home Activity Mom is a participant in the Amazon Series LLC Associates Program, 
an affiliate advertising program designed to provide a means for sites to earn advertising fees 
by advertising and linking to Amazon.com.
I get commissions for purchases made through links in this post. 


⠀
💜Besides being so much fun, there are also so many ways to extend the play too: ⠀
⠀
▪️Use tweezers to pick up the jewels⠀
⠀
▪️Make predictions before experimenting with how many jewels can fit on the boat before sinking⠀
⠀
▪️Talk about why the jewels sink by themselves but float on the sponge⠀
⠀
⠀
💜I know I’ve said this before😉. I’m a big supporter of STEM challenges for kids (science, technology, engineering, math). Incorporating simple and engaging challenges like this into play will encourage problem solving skills and creativity! ⠀
⠀
💦Do you think your children would have fun with this?💦⠀

Poke the Dirt

Wednesday, June 3, 2020 No comments


☀️poke the dirt☀️⠀
⠀
This activity can definitely be filed under my “lazy mom activities” list. Don’t get me wrong- I love these lazy mom activities. They are perfect because they don’t take time to prep, and they are a great way to easily keep your toddler entertained for a bit. ⠀
⠀
Austin (5) has been wanting to spend so much time in our front yard riding his bike. This is awesome except Brooklyn (2.5) has zero interest in her bike at this point and tends to get into “trouble” (usually trying to put our dog’s ball in the outdoor trash can over and over and over🤣) in our front yard. I’ve been trying to think of easy learning activities for her to do when she needs more structure. ⠀
⠀
💜I gave Brooklyn some toothpicks and an area of dirt I was okay with her poking! She had a great time poking the dirt with the toothpicks. You can also create shapes, numbers, or letters with the toothpicks in the dirt too! I made a triangle and then asked her what the shape was. So simple and fun! ⠀
⠀
🖤This activity encourages concentration and fine motor practice.

Spray and Sort

Sunday, May 31, 2020 No comments
Spray and Sort!


My kids did this activity multiple days in a row this past week and there's currently more ice cube trays in the freezer! They loved it!


Supplies Needed:
-ice cube trays
-water
-plastic bin
-spray bottle
-bear counters

Stay at Home Activity Mom is a participant in the Amazon Series LLC Associates Program, 
an affiliate advertising program designed to provide a means for sites to earn advertising fees 
by advertising and linking to Amazon.com.
I get commissions for purchases made through links in this post. 


Instructions:
1. Drop 1-2 bear counters in a water filled ice cube tray and freeze overnight
2. Once frozen, put ice cubes in a plastic bin or water table
3. Fill a spray bottle with warm water 
4. Have your child spray the ice cubes until melted and sort by color (we did this in the empty ice cube trays)


Extension Ideas: 
-Count how many of each color
-Graph the bears by color
- Talk about the quantities of each color using words like "more than," "less than"
-Make simple math problems for your child to solve

Examples:
"How many blue and red bears are there altogether?"
 "How many more yellow bears are there than orange?"
"Are there more yellow or purple bears?"


I hope you enjoy this activity as much as we do!

chalk obstacle game

Thursday, May 21, 2020 No comments


Happy Thursday! I've been saving this activity to share for #happythursdayletsplay and it's one of the activities my kids and I are going to create and do again this morning. 

You've probably seen at least one chalk obstacle course in the last couple of months. We see tons of them when we are out on walks, and we've done our fair share on our driveway. 

But after seeing @dayswithgrey's outdoor DIY chalk game, I got the idea to combine the two things together to create an outdoor chalk game with an obstacle course twist! My kids absolutely love board games and love being outside so I knew this would be a hit!


Stay at Home Activity Mom is a participant in the Amazon Series LLC Associates Program, 
an affiliate advertising program designed to provide a means for sites to earn advertising fees 
by advertising and linking to Amazon.com.
I get commissions for purchases made through links in this post. 


Here's what to do:
To make a big die, I used a box, white paper and a sharpie, and packaging tape. After drawing the sides of the die on the paper, I taped them down on each side of the box with the tape. Draw a board game with chalk on your driveway. In some of the boxes I put simple directions like -4 or +3. In other boxes I put some obstacle course directions (hop on 1 foot 10 times, spin around 3 times, 5 jumping jacks, etc.)

My whole family (husband included) had such a great time playing this game for multiple days in a row until the rain washed it away. It's for sure something we will do again and perfect for the spring and summer. 

Family games are a free and easy way to connect and bond with each other, they are great practice for taking turns, learning how to be a good sport, and following directions. There was also some math and gross motor skills involved in this game too! This game can easily be adapted to whatever is age appropriate for your kids. 

Who is going to make a chalk obstacle game?

Click here to see more pictures of the game and follow me on instagram to see my latest activities! 


abc rock hunt

Wednesday, May 6, 2020 No comments

What's better than an outdoor scavenger hunt to help with letter recognition?! 

Here's what you do:

Paint some rocks (you can use washable paint like me, just beware of water💦🚫). After doing some research, rock painters suggest acrylic paint and a sealer. I don’t have time for that! 🤣 Write letters on them with a sharpie once the rocks are dry and hide! ⠀
⠀
Have fun searching for all the ABC rocks! You can even put them in ABC order after you find them all! We are saving ours (in a nice and dry place) to use over and over again!

⠀


⠀
🖤Why? ⠀
Letter recognition ⠀
Active play ⠀


(first set of abc rocks)

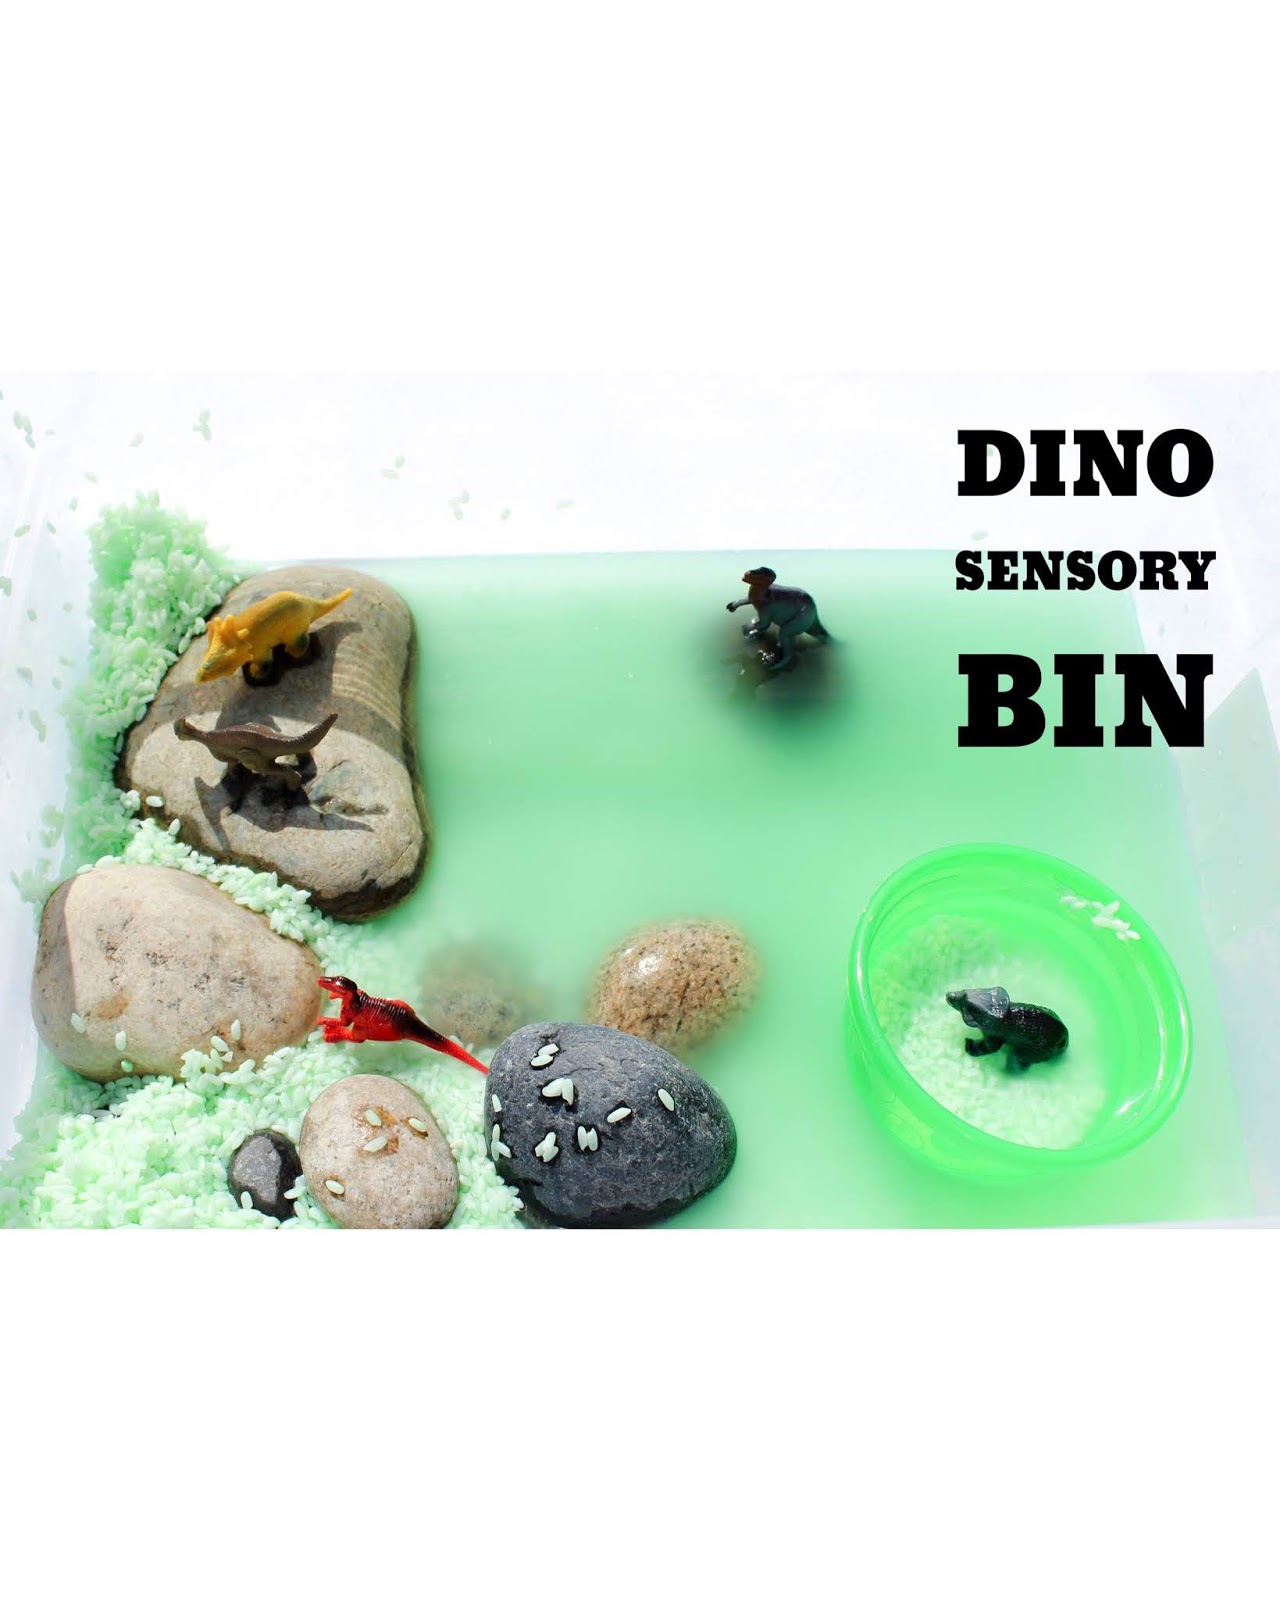
Dino Sensory Bin

Monday, May 4, 2020 No comments
Dinosaurs, water and rice. I'm loving this combination!

It took less than 5 minutes to set up and it kept my kids busy playing on and off all afternoon when they were outside! 


Here's what you need:
-A plastic storage bin
-rice (mine was dyed green, but that's optional)
-rocks of different sizes (I picked some from our backyard)
-water (you could add a drop of green food dye if you want)
-little dinosaur toy figures
-small bowls/scoopers (optional)


Stay at Home Activity Mom is a participant in the Amazon Series LLC Associates Program, 
an affiliate advertising program designed to provide a means for sites to earn advertising fees 
by advertising and linking to Amazon.com.
 I get commissions for purchases made through links in this post. 


Here's what to do:
Pour rice in an empty storage bin. I started with all the rice on one side. Add a little bit of water (so that some of the rice is not fully submerged on the side), some rocks of different sizes, little dinosaur toys, and 1-2 small bowls or scoopers.

I also put a second storage bin with just water right next to it but that's optional too! I just knew my kids would want to clean off their Dinos and their own hands when they got rice all over them. 


Foil River

Monday, April 27, 2020 No comments
💦Foil River💦⠀
⠀
Another beautiful day means another outdoor activity! ⠀
⠀
This is one we will for sure do again and again. Not only did the kids have a blast, it was an activity that needed teamwork and problem solving! The “river” didn’t work perfectly in the beginning and we worked together to get it working the way we wanted. ⠀
⠀
💜 Find a sloped space outside. Take a roll of foil (not the precut pieces) and roll out your “river”. Bend both sides of the foil up to keep the water from spilling out. We placed a rock on the foil at the start of the river and put a pan at the bottom to capture the water at the end to reuse. Getting the pan to work at the bottom was a challenge, but it was great to see my kids trying different things, throwing out ideas and problem solving until we figured it out! We ended up using a plastic funnel and extra foil to get the water entering the pan at the bottom. Check my highlight stories under “active play” to see it more close up!⠀
⠀
Put a big storage container of water with different cups for pouring (or just use a hose) and some items to put down the river at the start. We mainly did balls (ping pong balls and other plastic toy balls we had around the house). ⠀
⠀
Pour water to send items down the river and have fun! ⠀


⠀
Next time I’m thinking we will make “boats” to send down our river! ⠀
⠀
🖤Why? ⠀
⠀
STEM activity ⠀
Teamwork⠀
Problem solving ⠀